Apex Data App - Screening Clients
- 07 Aug 2024
- 2 Minutes to read
- Contributors


- Print
- DarkLight
- PDF
Apex Data App - Screening Clients
- Updated on 07 Aug 2024
- 2 Minutes to read
- Contributors
- Print
- DarkLight
- PDF
Article summary
Did you find this summary helpful?
Thank you for your feedback!
The Apex Data App allows for kiosk style screening directly on your tablet or other mobile device.
NOTE: Screenings administered via either the Apex App or Apex School-Based Health Center (SBHC) Data Hub can be associated with a Client Profile or can be administered anonymously. See Apex Data - Anonymous Surveys for more.
LOG IN
Open the Apex Data App on your device and log in using either your six-digit PIN or your email address and password. (Please note that your login information is the same for the SBHC Data Hub and the App.) See Apex Data App - Logging In for more details.
DOWNLOAD SURVEY TOOLS
If this is your first time using the App since it was installed, you’ll need to download the survey tools/forms you want to administer to your clients.
For more detailed information, see Downloading and Updating Forms. Please note that this step usually only needs to be completed when first using the App.
ADMINISTER A SURVEY TOOL
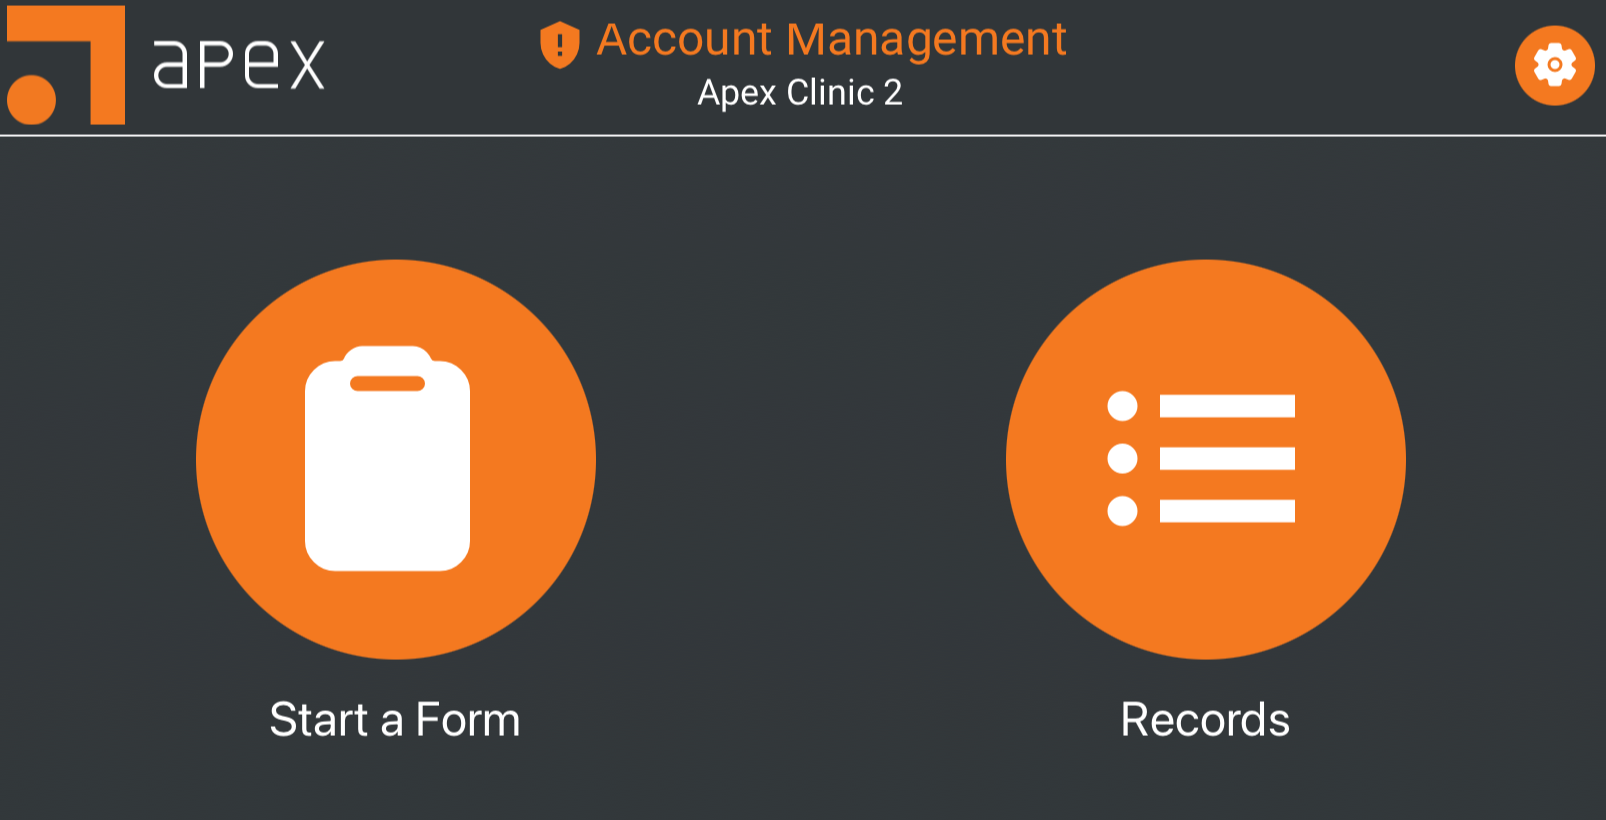
From the home screen page select Start a Form.
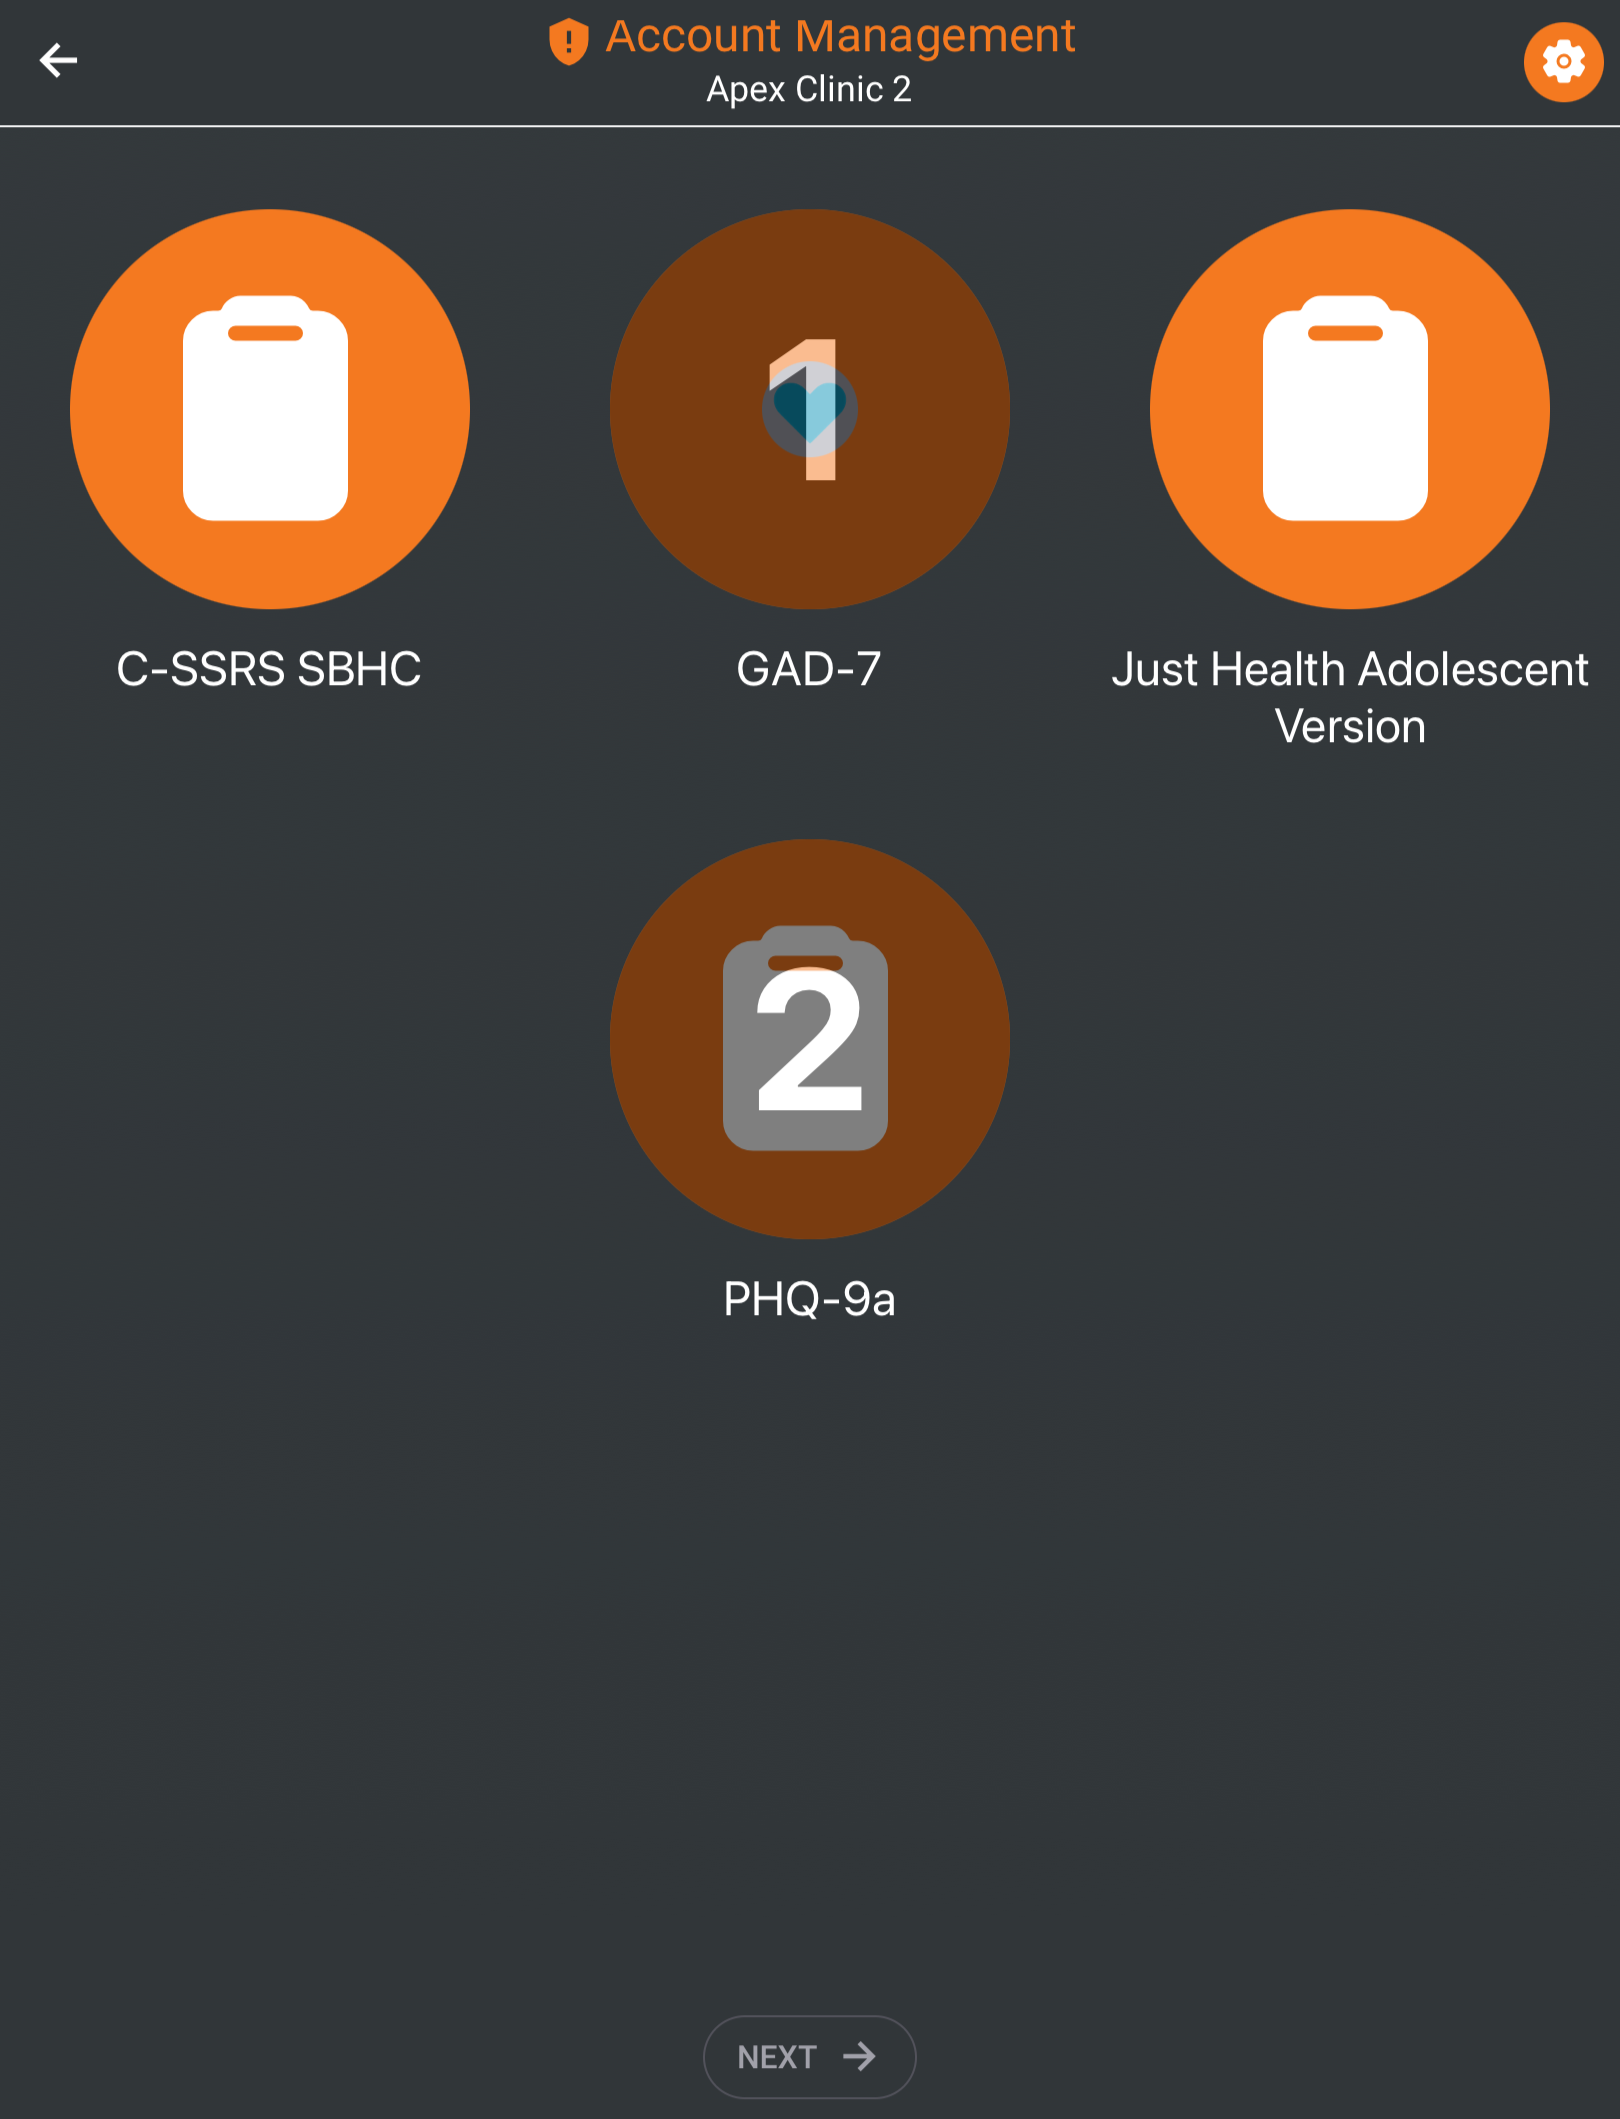
Choose the screening/survey tool(s) to be administered and click Next to continue.
Numbers will appear over the selected tools. These numbers indicate the order in which the surveys will be administered to the client.
The next page will have a search field to find an existing client, with the option to create a new profile if the client is not in the system.
If the client is already in the system, you may select their name from the list or use the search bar to find them.
Tap on a client’s name to select them for the survey(s).
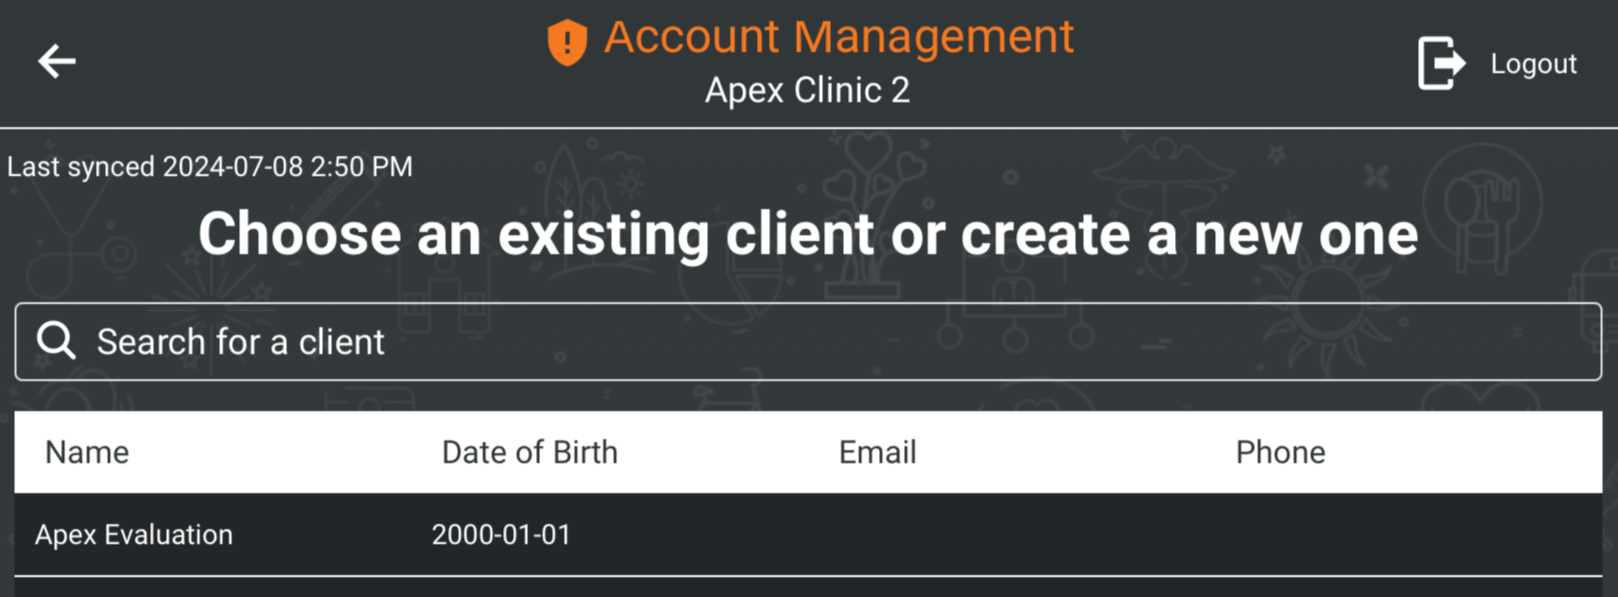
If the client is not already in the list of existing clients, click Create Client at the bottom of the page.

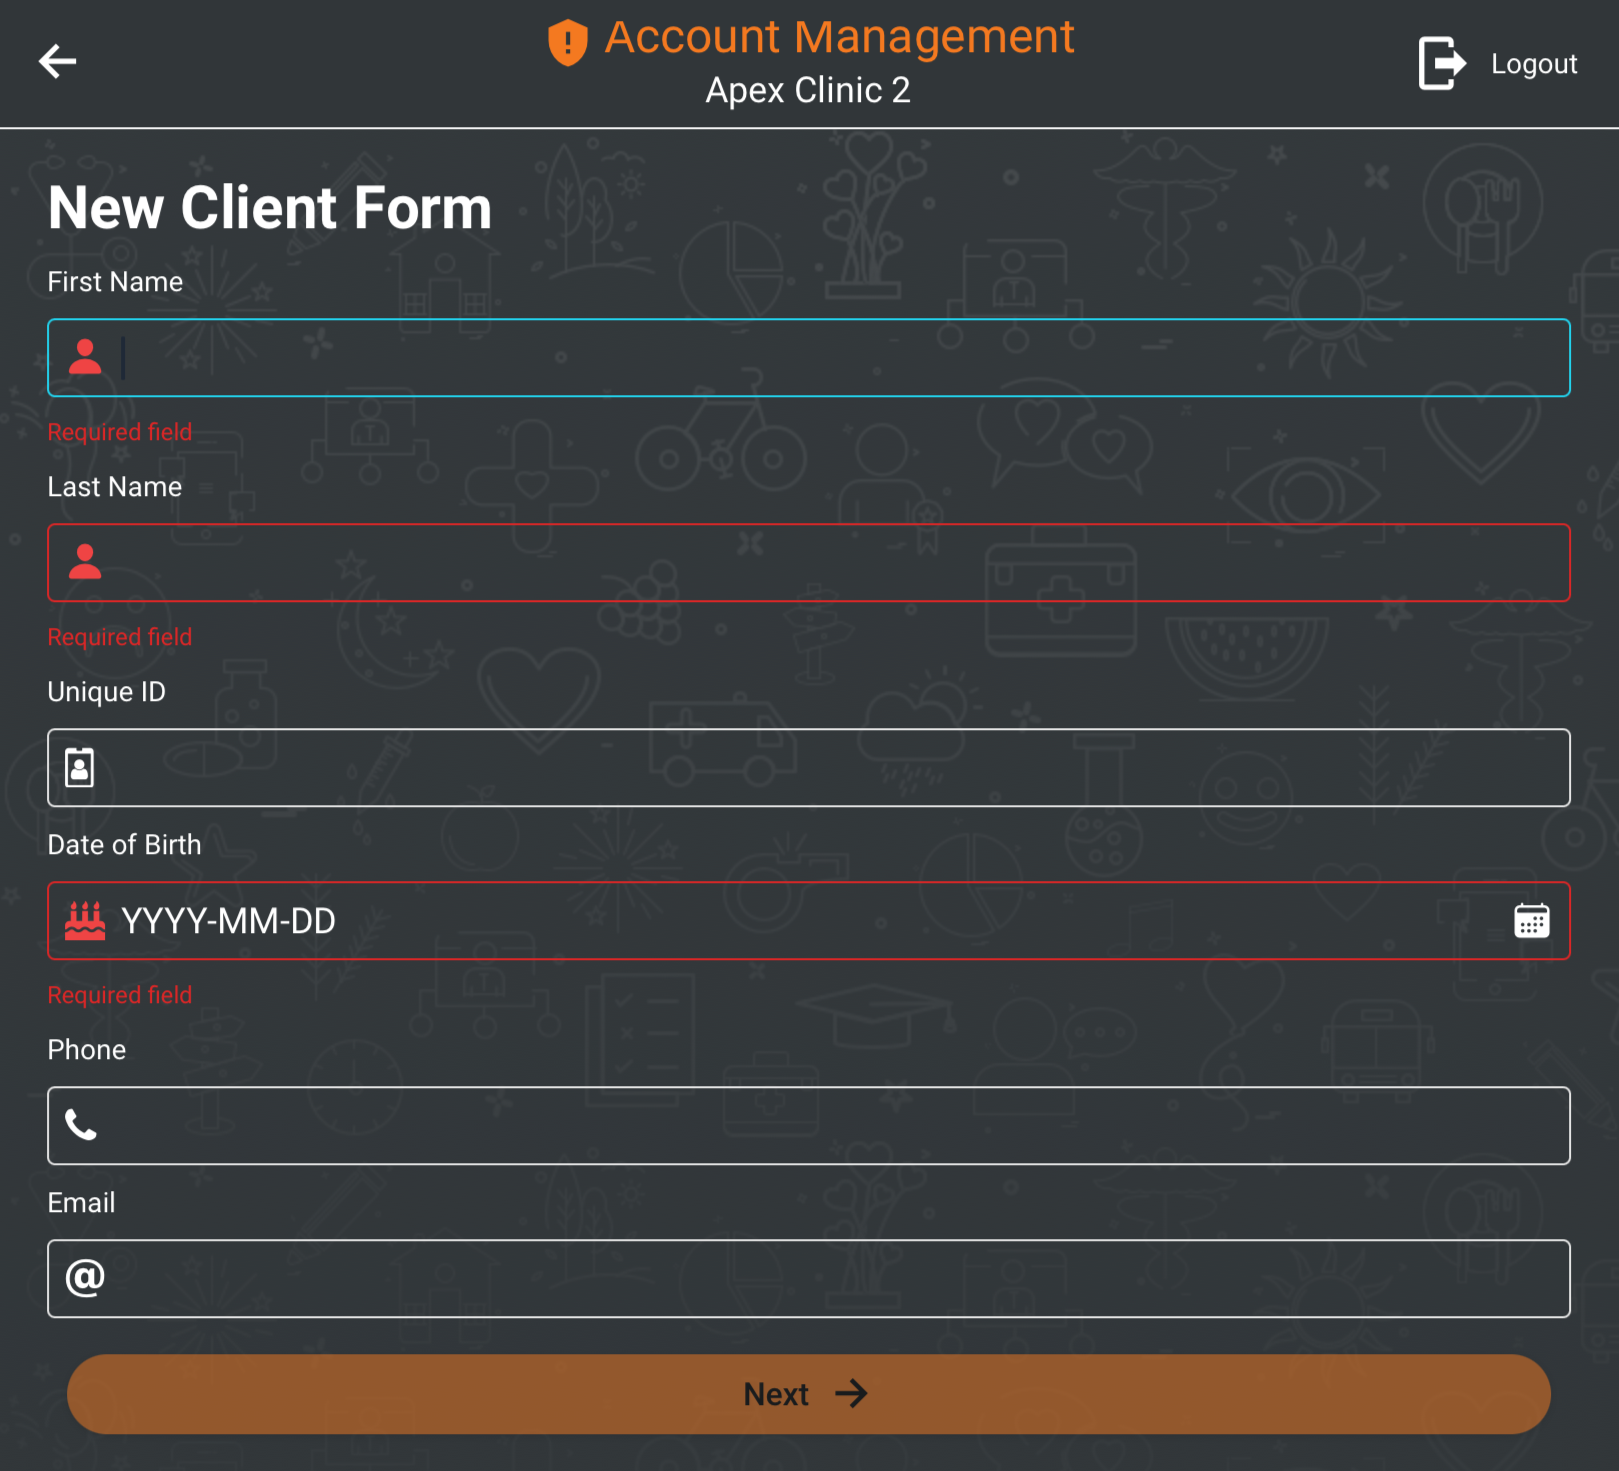
The New Client Form will appear, requesting the full name, date of birth, and contact information as shown.
Enter the required information and click Next.
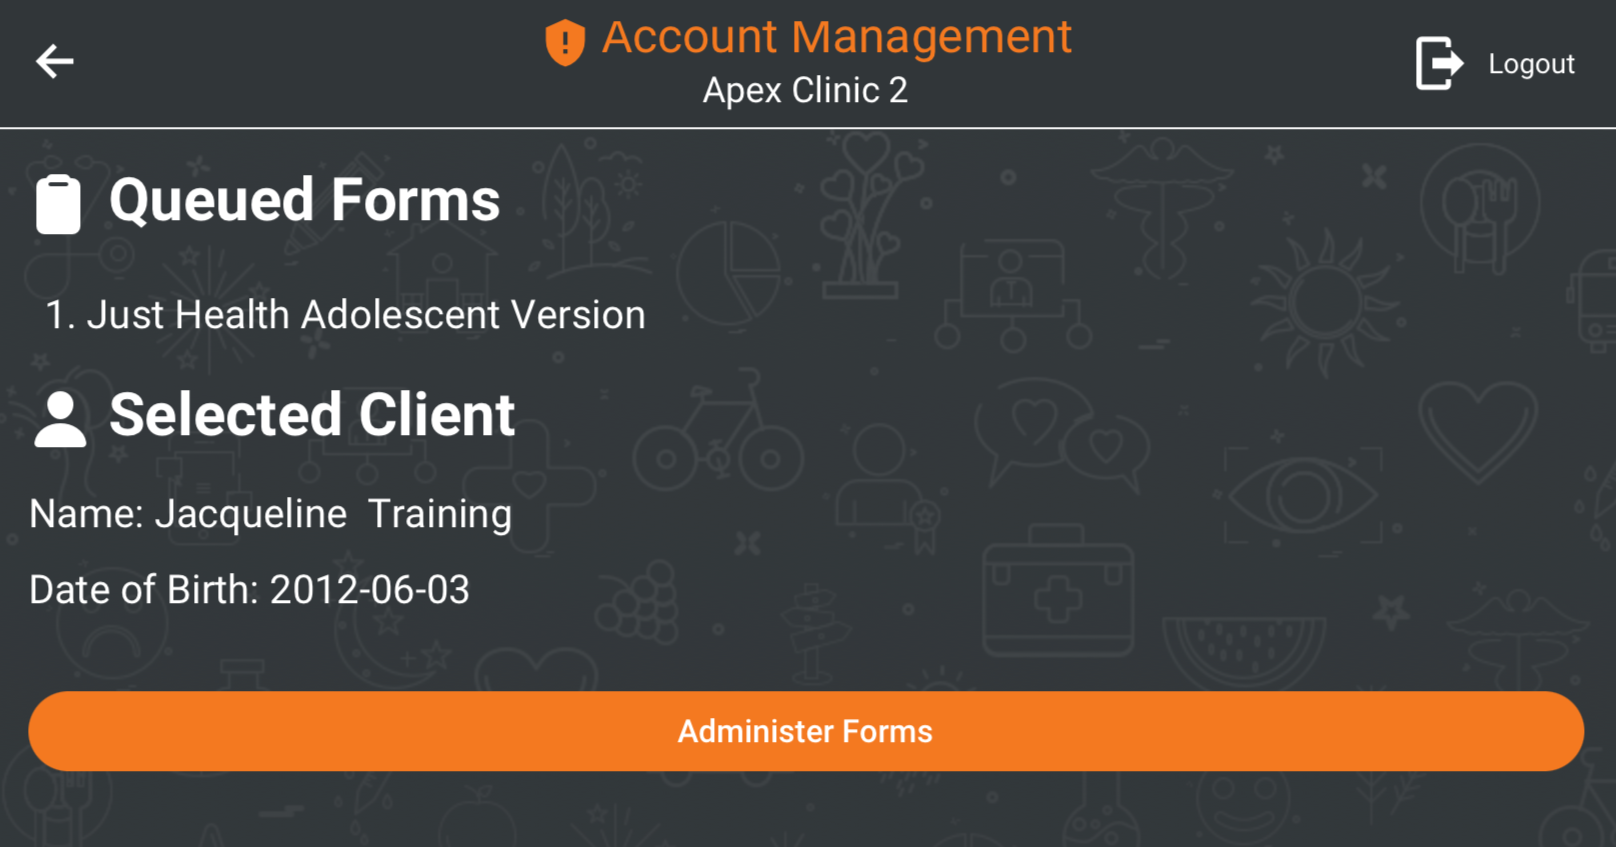
Once the client has been chosen, the system will display Queued Forms and Selected Client. If the information is correct, click Administer Forms to continue.
If the information is incorrect, use the back arrow at the top left of the screen to return to the previous pages.
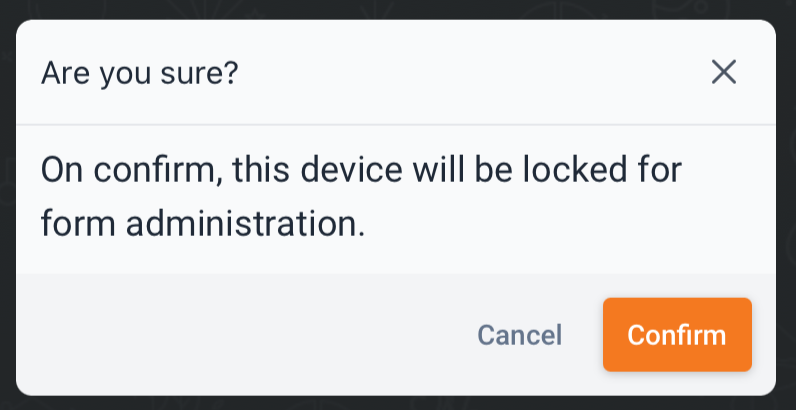
A confirmation message will appear notifying you the device will enter Form Administration Mode, allowing you to safely hand the device to your client. Click Confirm and pass the device to the client to complete the screening.
The App will require your PIN number to re-open any previous content after this point.
After your client has completed their survey, you may also want to view the client record reports or complete a provider review. This can be done directly in the App or in the SBHC Data Hub. See Reports and Provider Reviews for more information.
Need more help? Try Troubleshooting the Apex App.
Was this article helpful?